
Homemade Artisan Bread
My mother made her own bread at home for longer than I can remember, and as much as I loved the warm and comforting aroma of baking bread that filled the kitchen, I couldn’t understand why she would go through so much effort week after week. Now that I’ve started making it myself, I get it. Making bread at home is one of the most therapeutic and relaxing activities. There’s something incredibly satisfying about mixing a few simple ingredients, kneading the dough, and watching it transform into a golden, crusty masterpiece.
Like all Italians, I love bread. Not just any bread, though—artisan bread. The kind with a crispy crust and an airy, chewy center that tastes like it came straight from a countryside bakery in Southern Italy. Some recipes make it sound easy: “Just mix flour, water, yeast, and salt, and voilà—bread!” But anyone who’s actually tried making it knows it’s not that simple.
Bread-making is a science. The type of flour you use, the fermentation process, gluten development—it all matters. One baker insists you must add the yeast and salt at the very end, while another tells you to throw everything in at once. Who’s right? Well, I’m no Paul Hollywood, but after plenty of trial and error, I’ve found my own method—one that consistently delivers a light, crusty, and downright delicious result.
So, if your first few attempts come out looking like failed science experiments, don’t panic. Keep at it and trust the process. Because when you finally pull a perfect loaf out of the oven, you’ll realize—bread-making isn’t just about baking. It’s an experience.
Homemade Artisan Bread
🕓 Rising Time: 20 hrs ⏳ Cook Time: 40 min 🥖 Makes one 10″ loaf
Ingredients:
- 500 g bread flour (17.5 oz)
- 375 ml warm water (1 ¾ cups)
- 15 g salt (4 tsp)
- 10 g dry yeast (3 tsp)
- 10 g honey (3 tsp)
Directions:
While this bread is easy to make, it requires a total of 20 hours of proofing time. I like eating it straight out of the oven, with a sprinkle of extra virgin olive oil, so I usually bake it right before dinner.
- Place flour, salt, yeast and about two thirds of the water in a bowl and mix with a wooden spoon until just blended together. A lighter flour requires less water, so just in case keep adding the rest of the water.
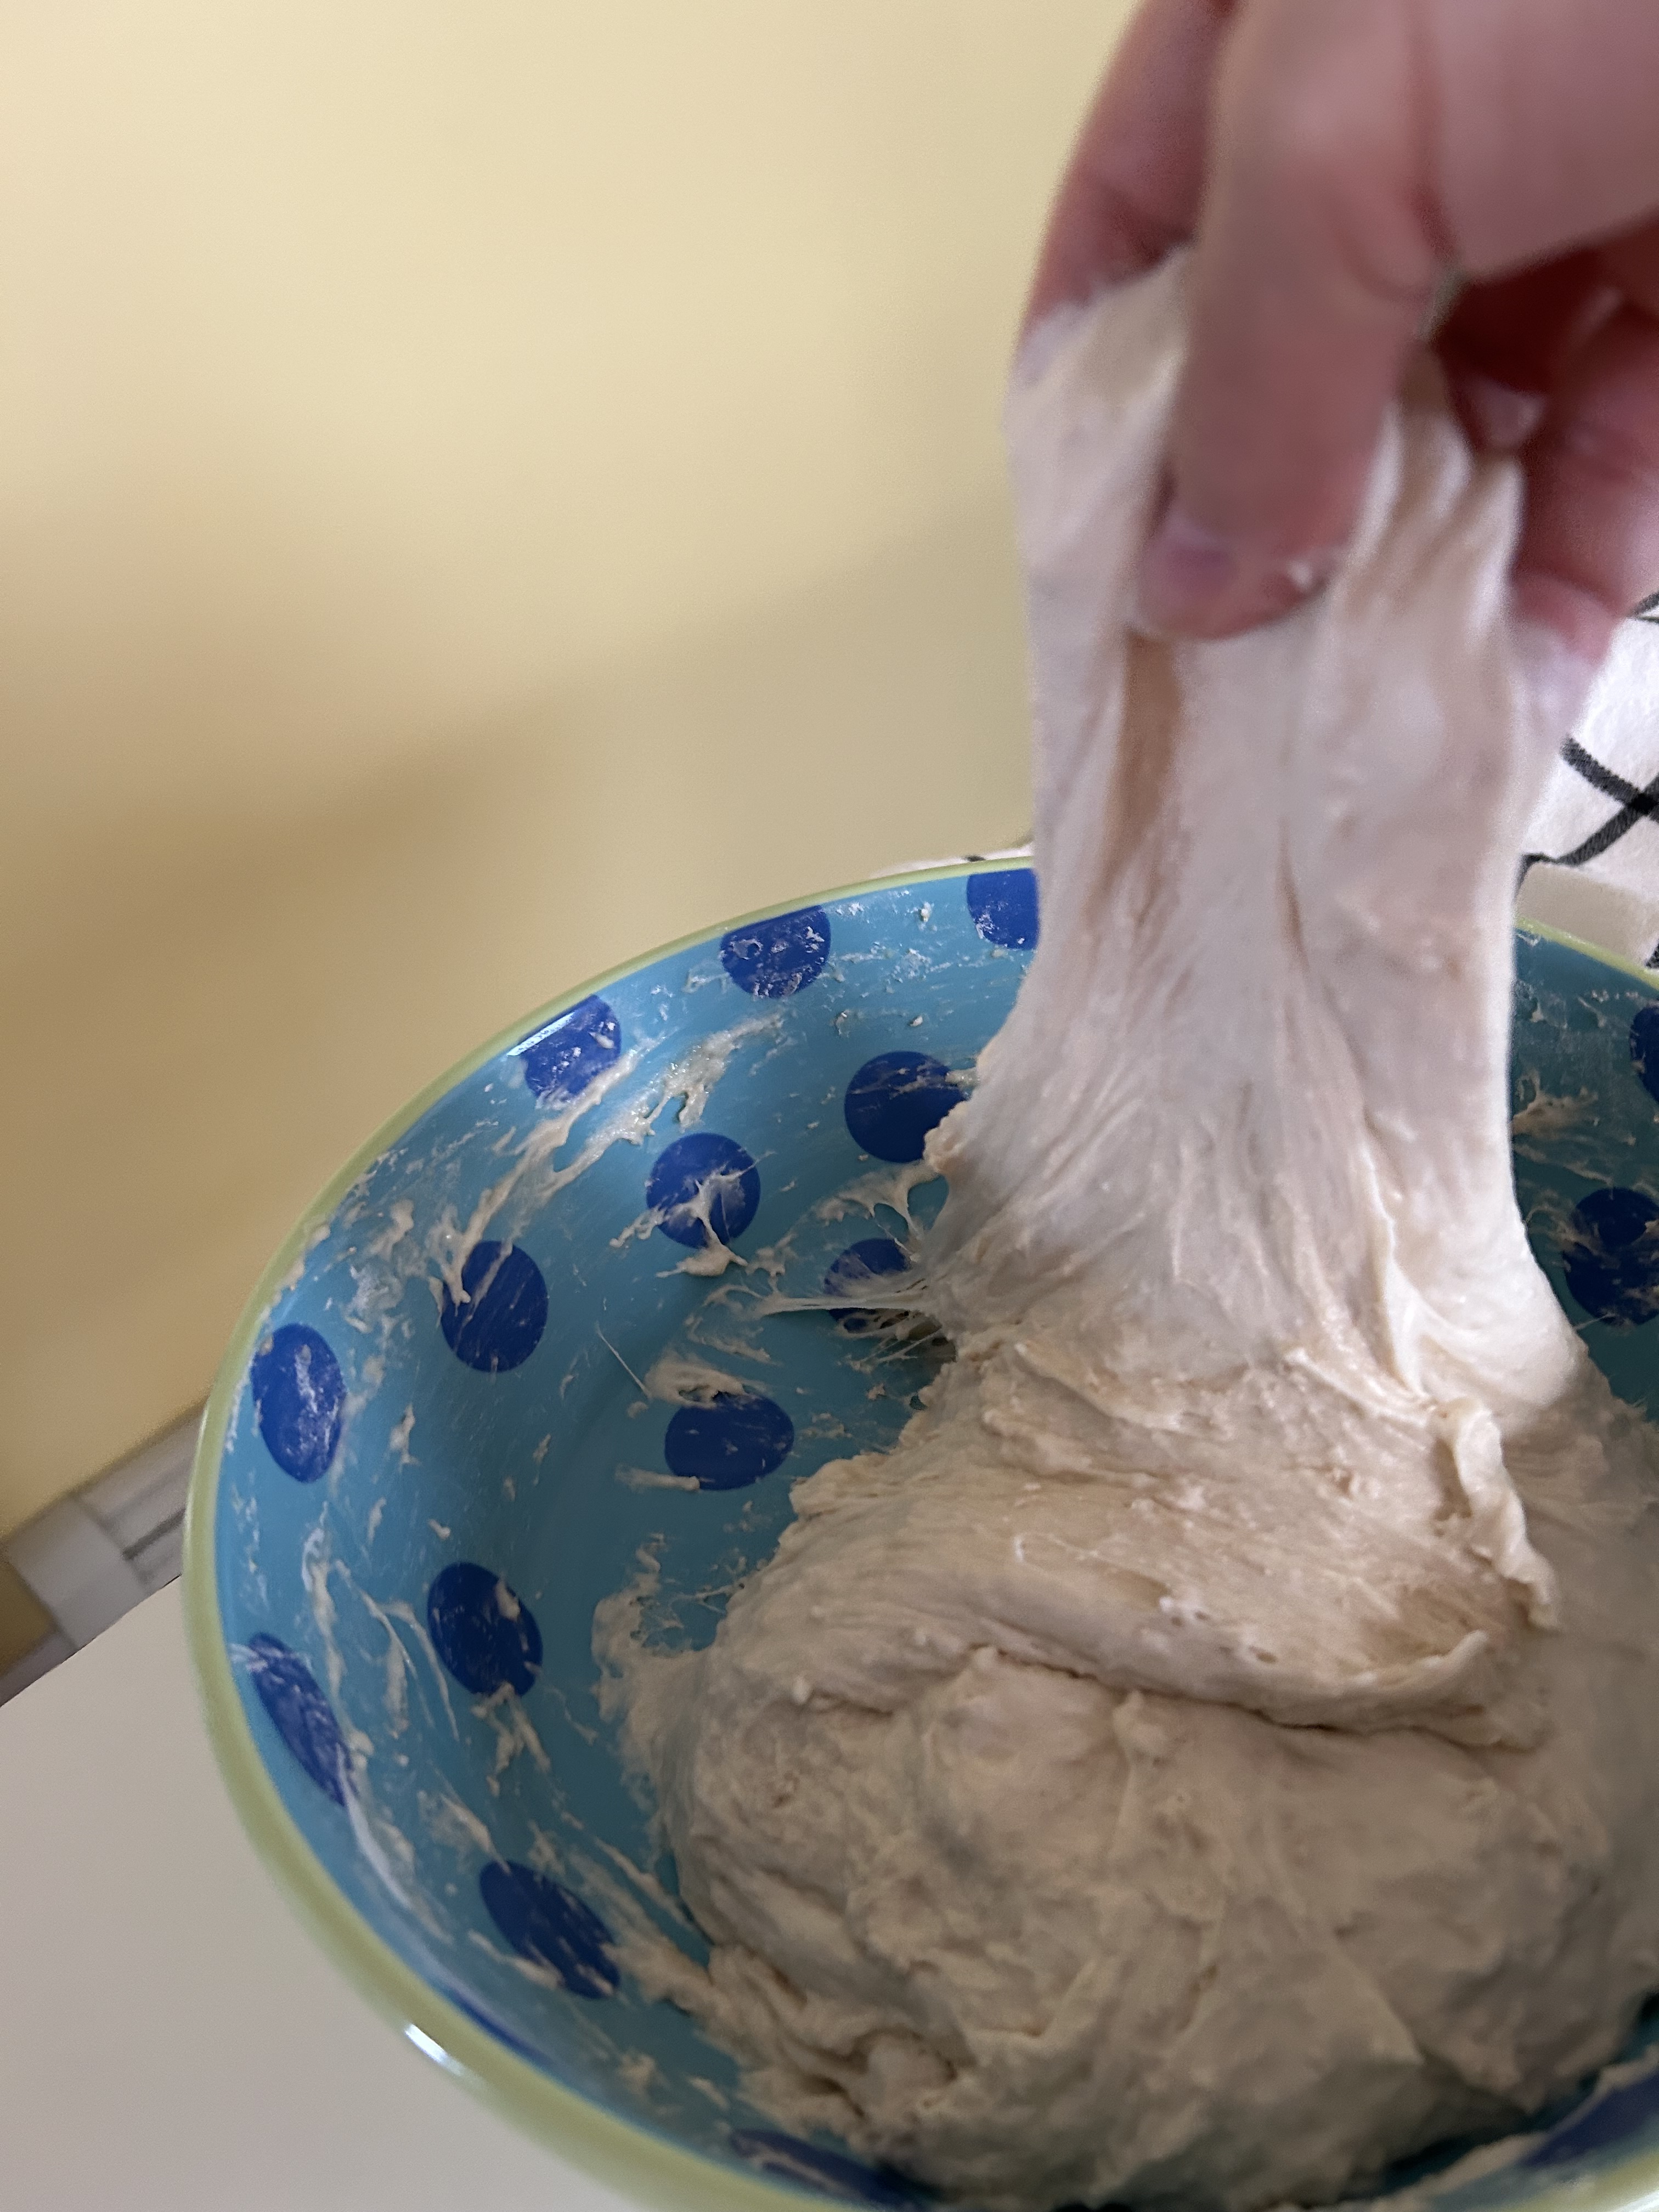
- Add the honey and mix until incorporated and no flour remains in the bottom of the bowl. The dough will be very sticky at this stage. Cover with a kitchen towel and let the dough rest for 15 minutes.
- After 15 minutes, wet the tips of your fingers and lift one side of the dough, stretch it out a little and fold it over the middle; pick up another side, stretch it out and fold it over the middle, and so on, until all four sides have been folded. Repeat this process 3 times: 3 sets of folding every 15 minutes.

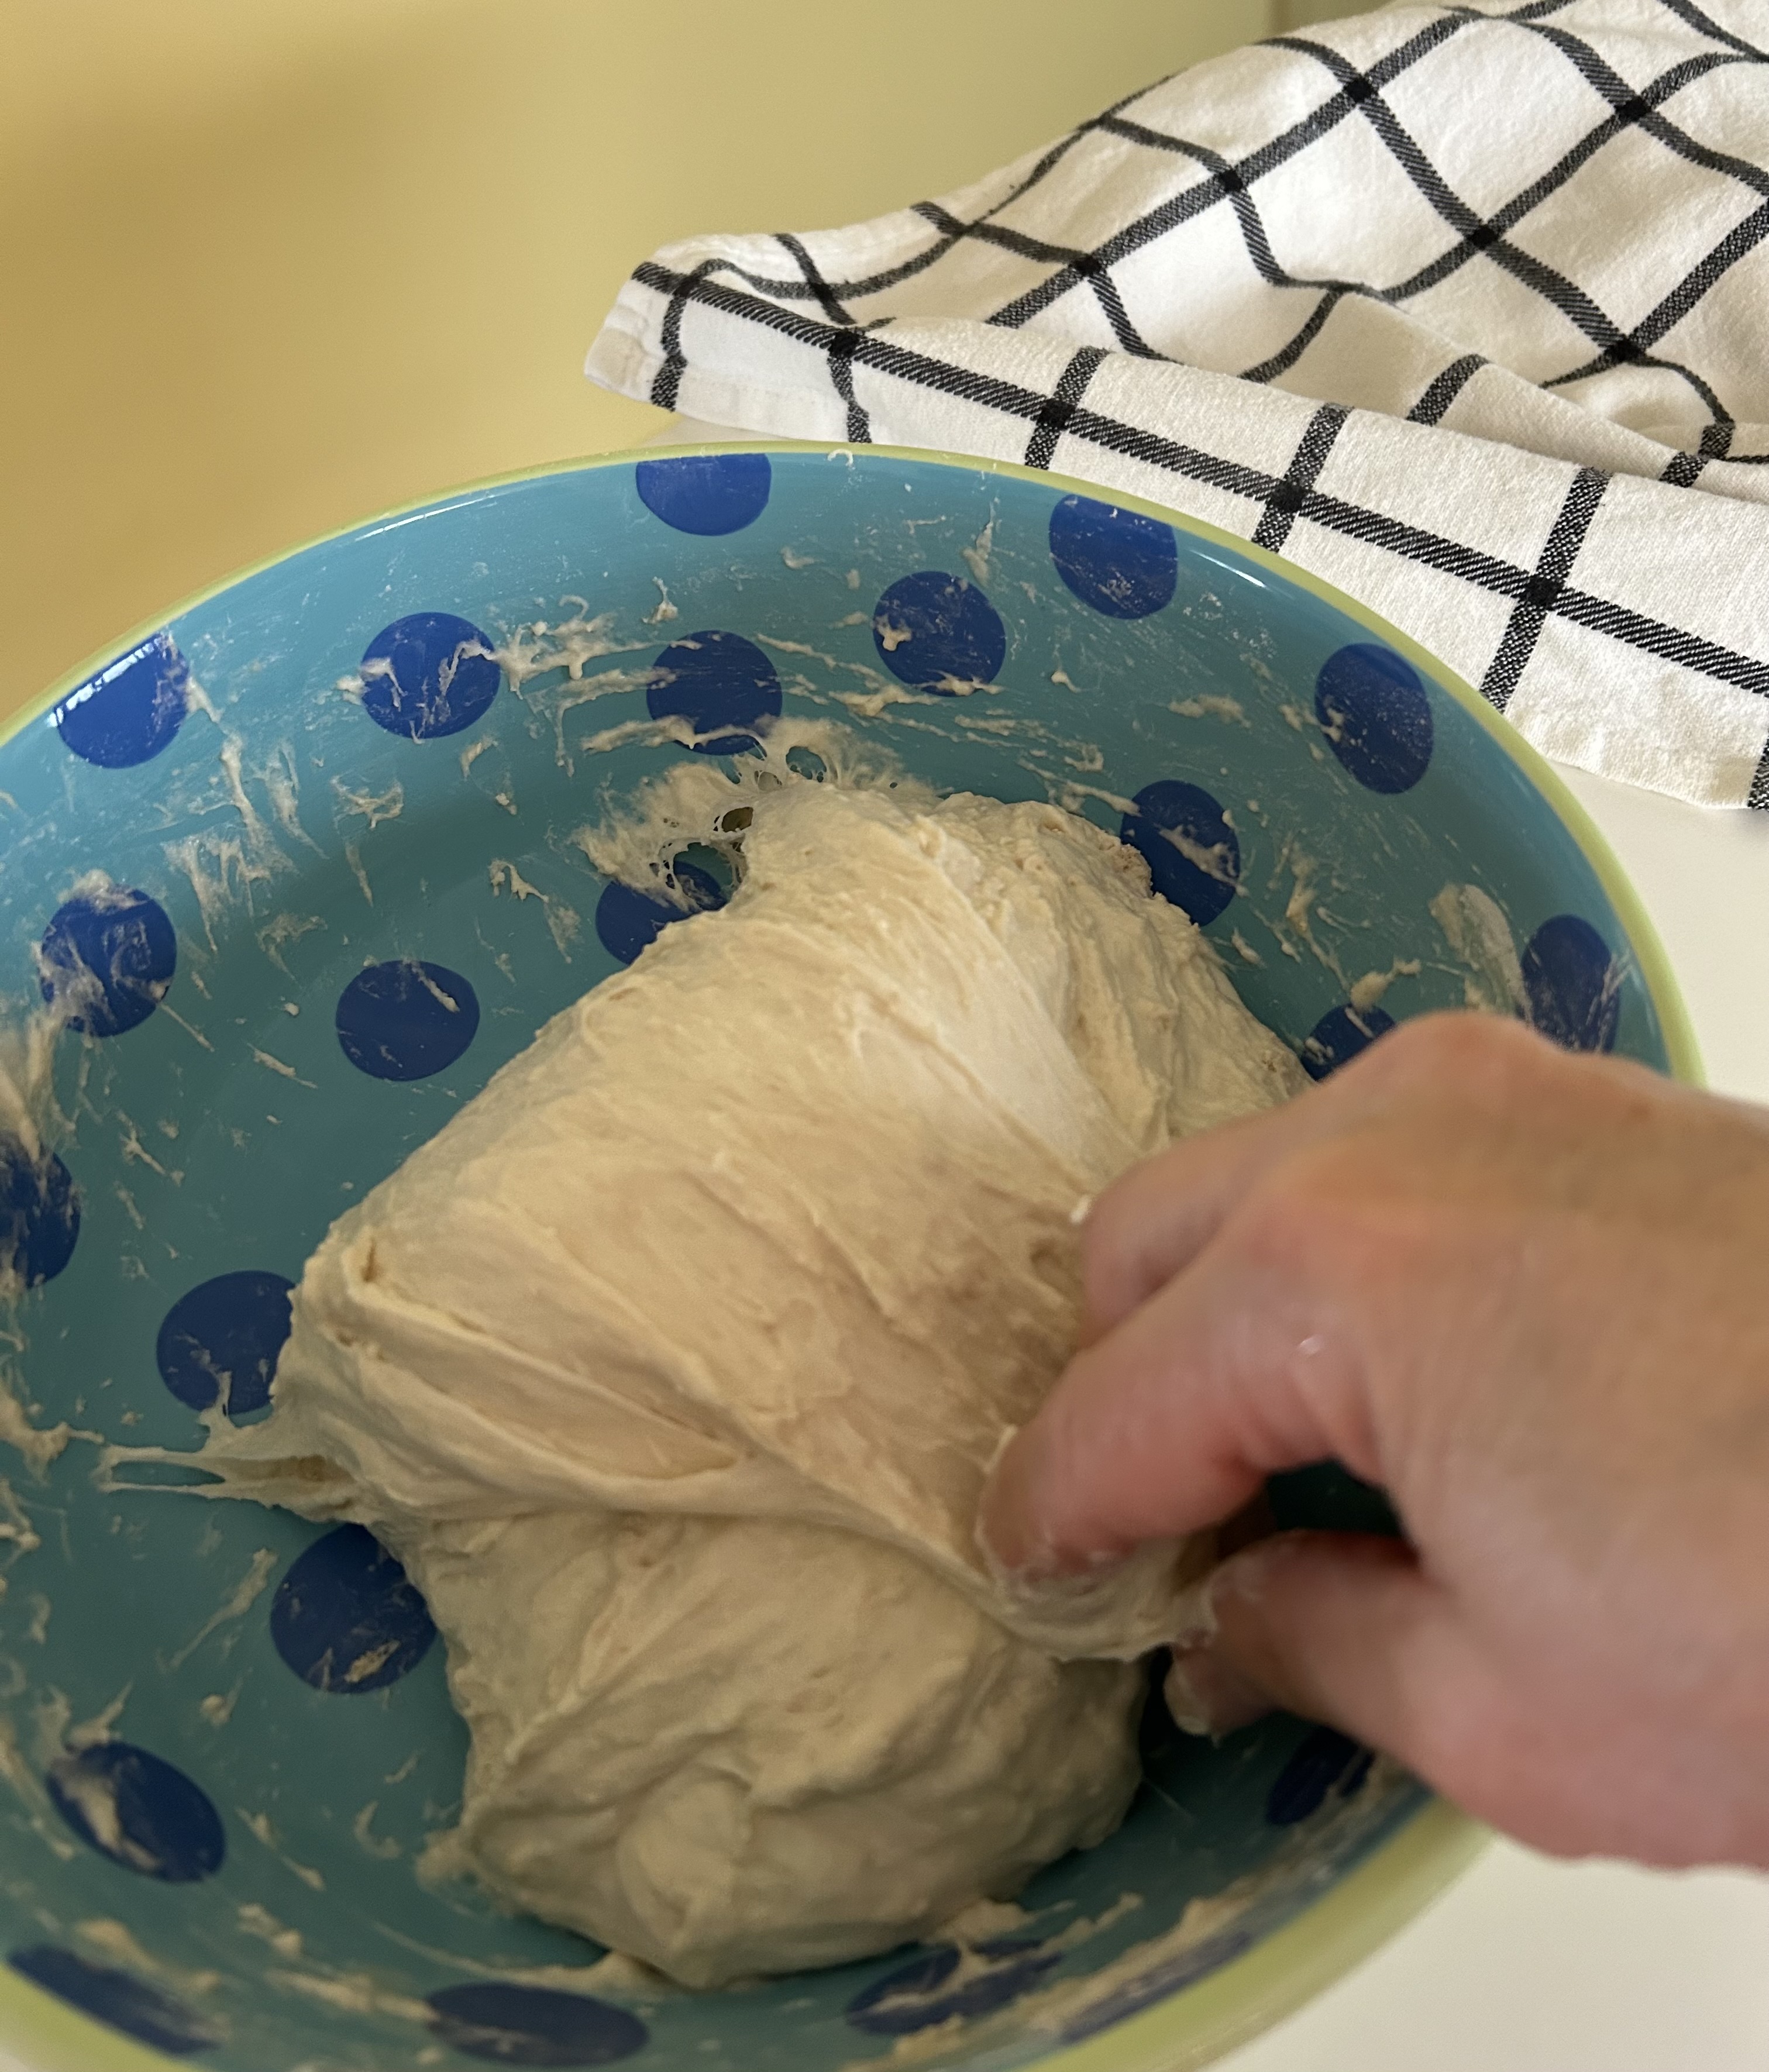
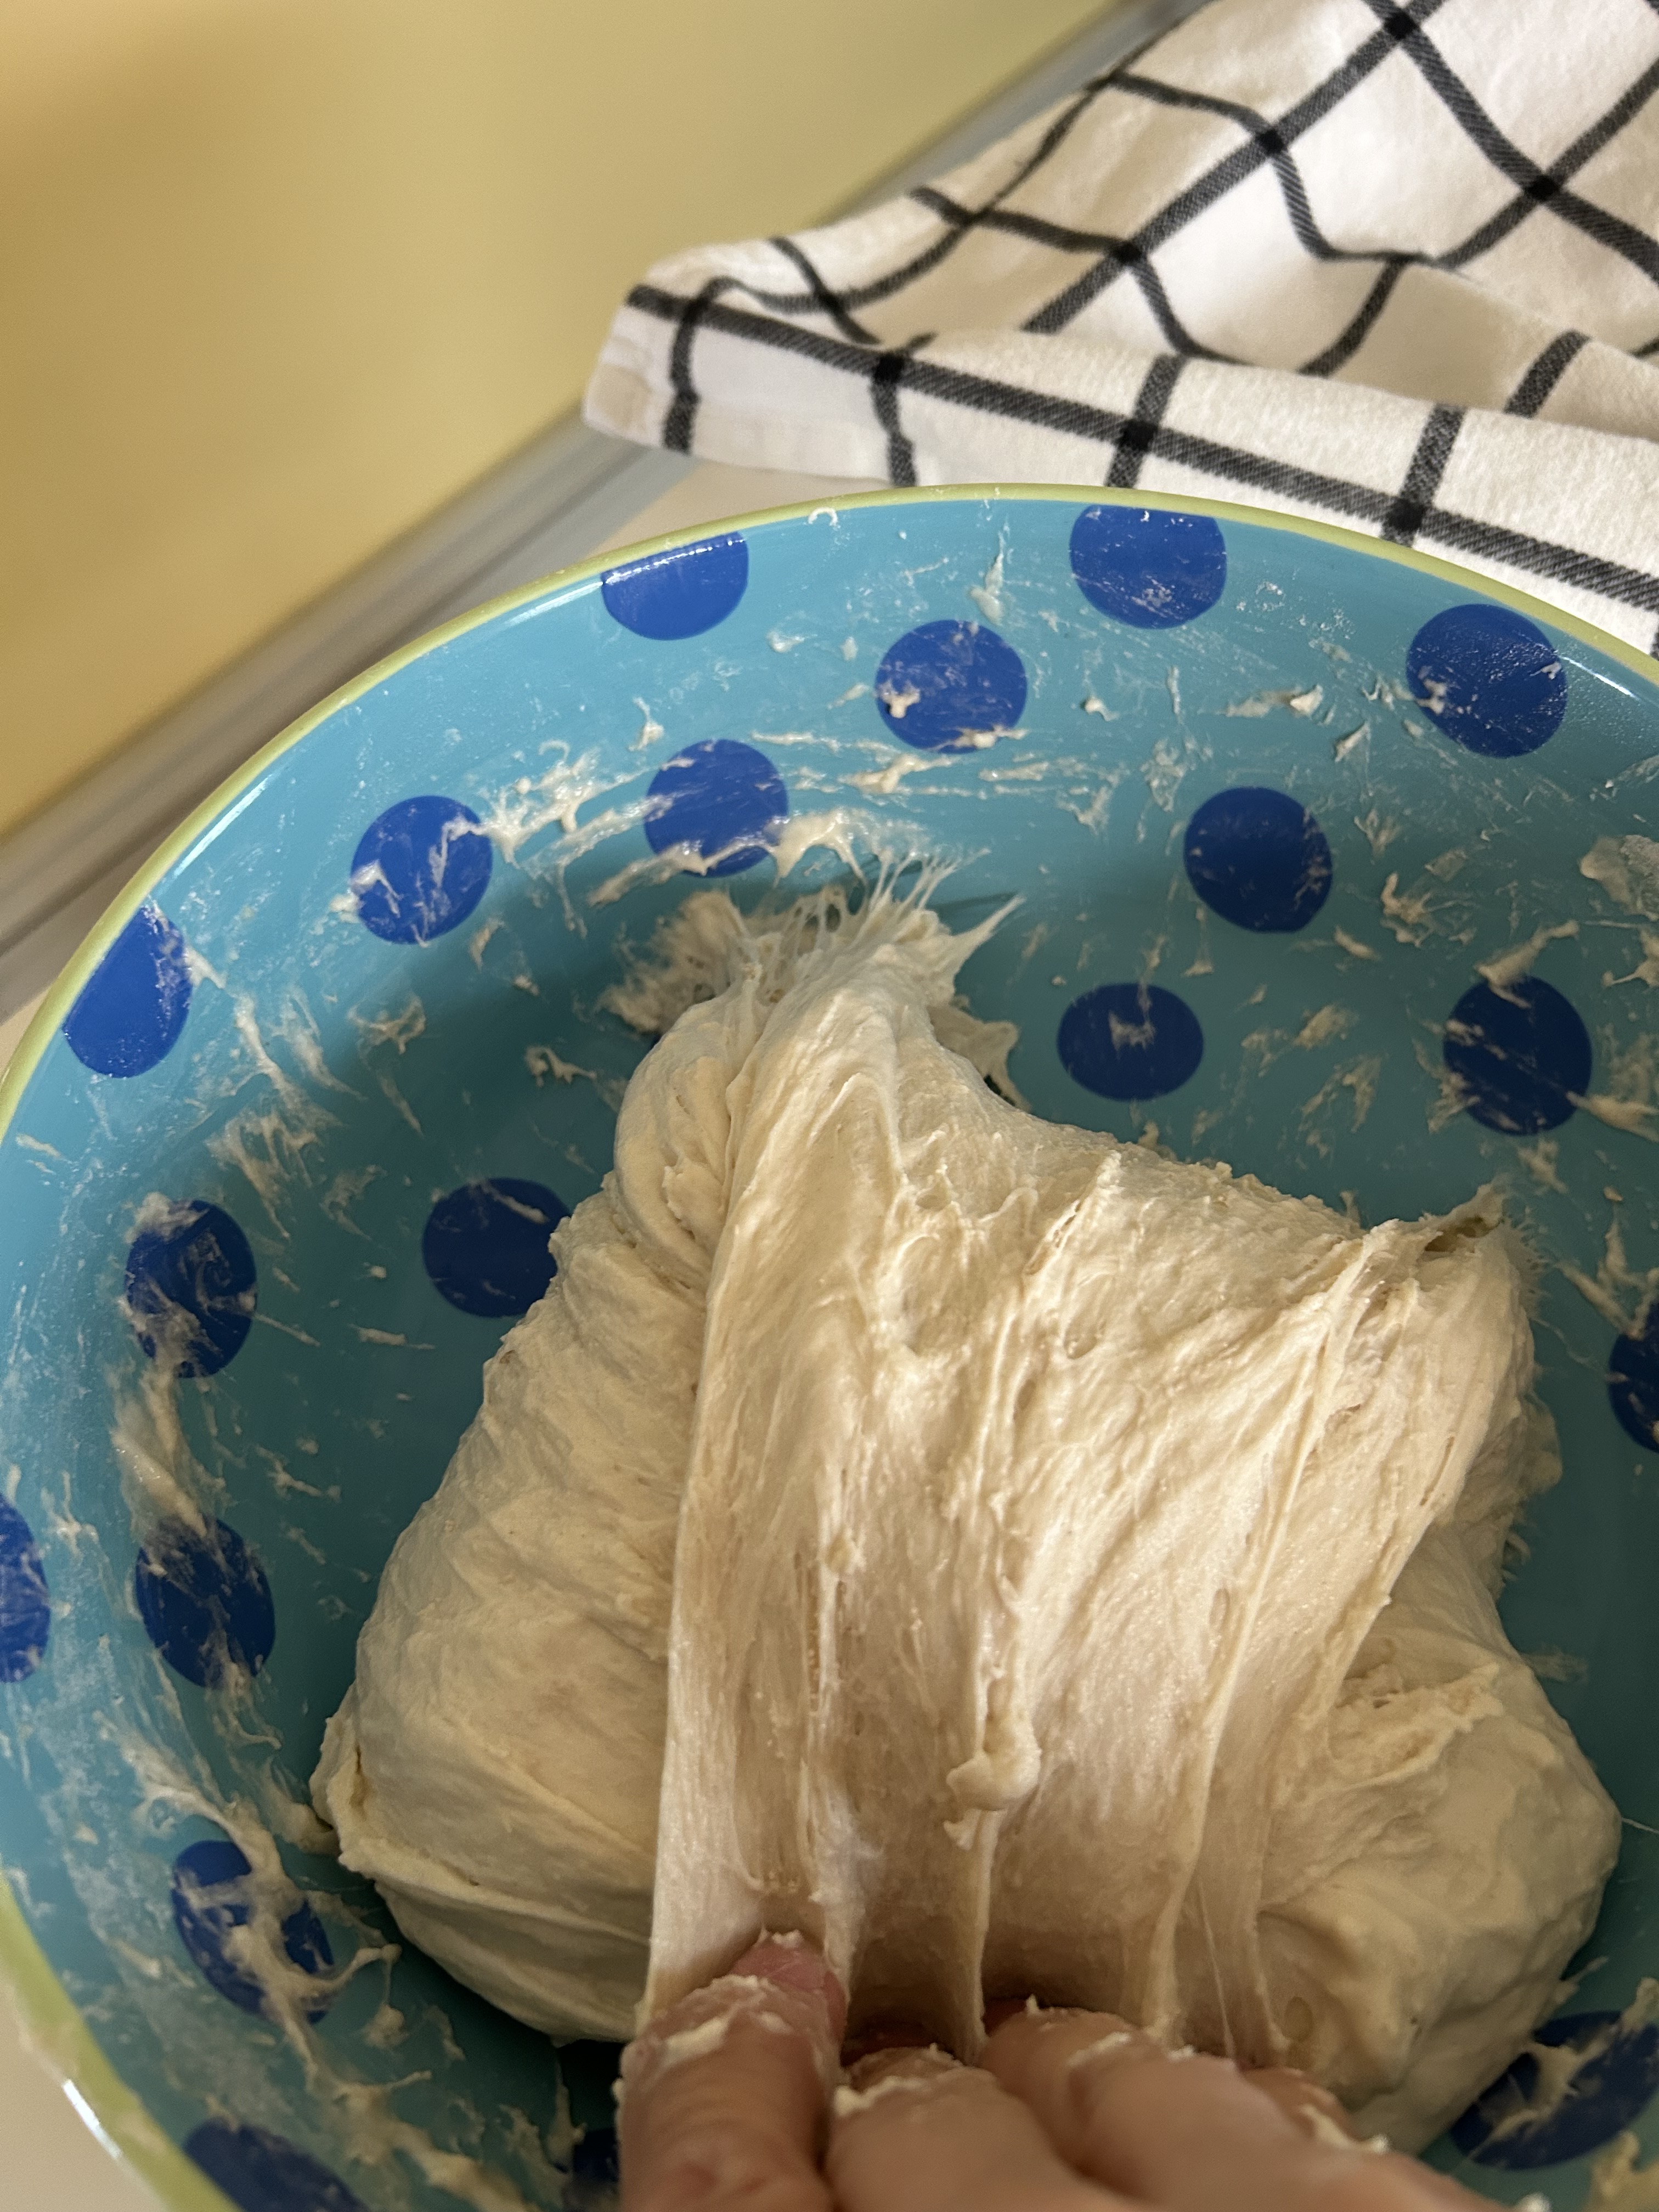
4. After the last folding, cover the bowl with plastic wrap and let rest for 16 hours at room temperature.
5. After the 16 hours are up, place a clean kitchen towel on the counter and sprinkle generously with flour. Turn the dough over onto the towel with the help of a dough scraper. Delicately stretch each of the four sides one by one and fold them towards the middle to form a bundle. Continue to fold the ends and pinch the ends together to make a rounded shape. Place the towel with the dough into a bowl and let rest in the refrigerator for four hours.
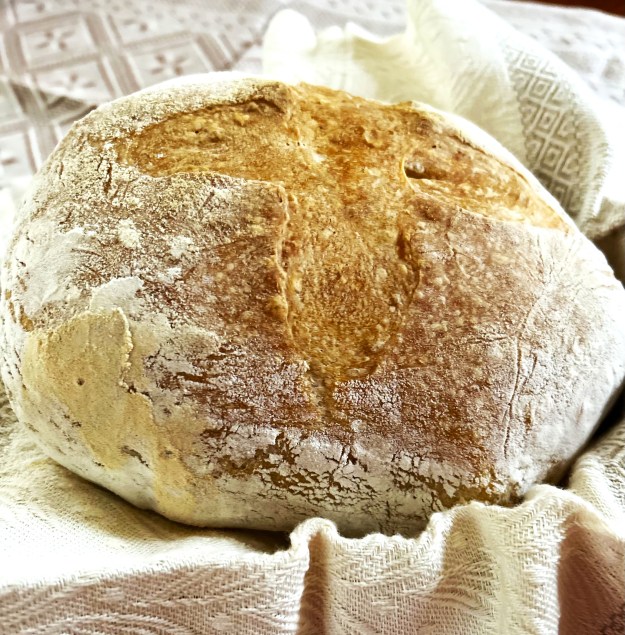
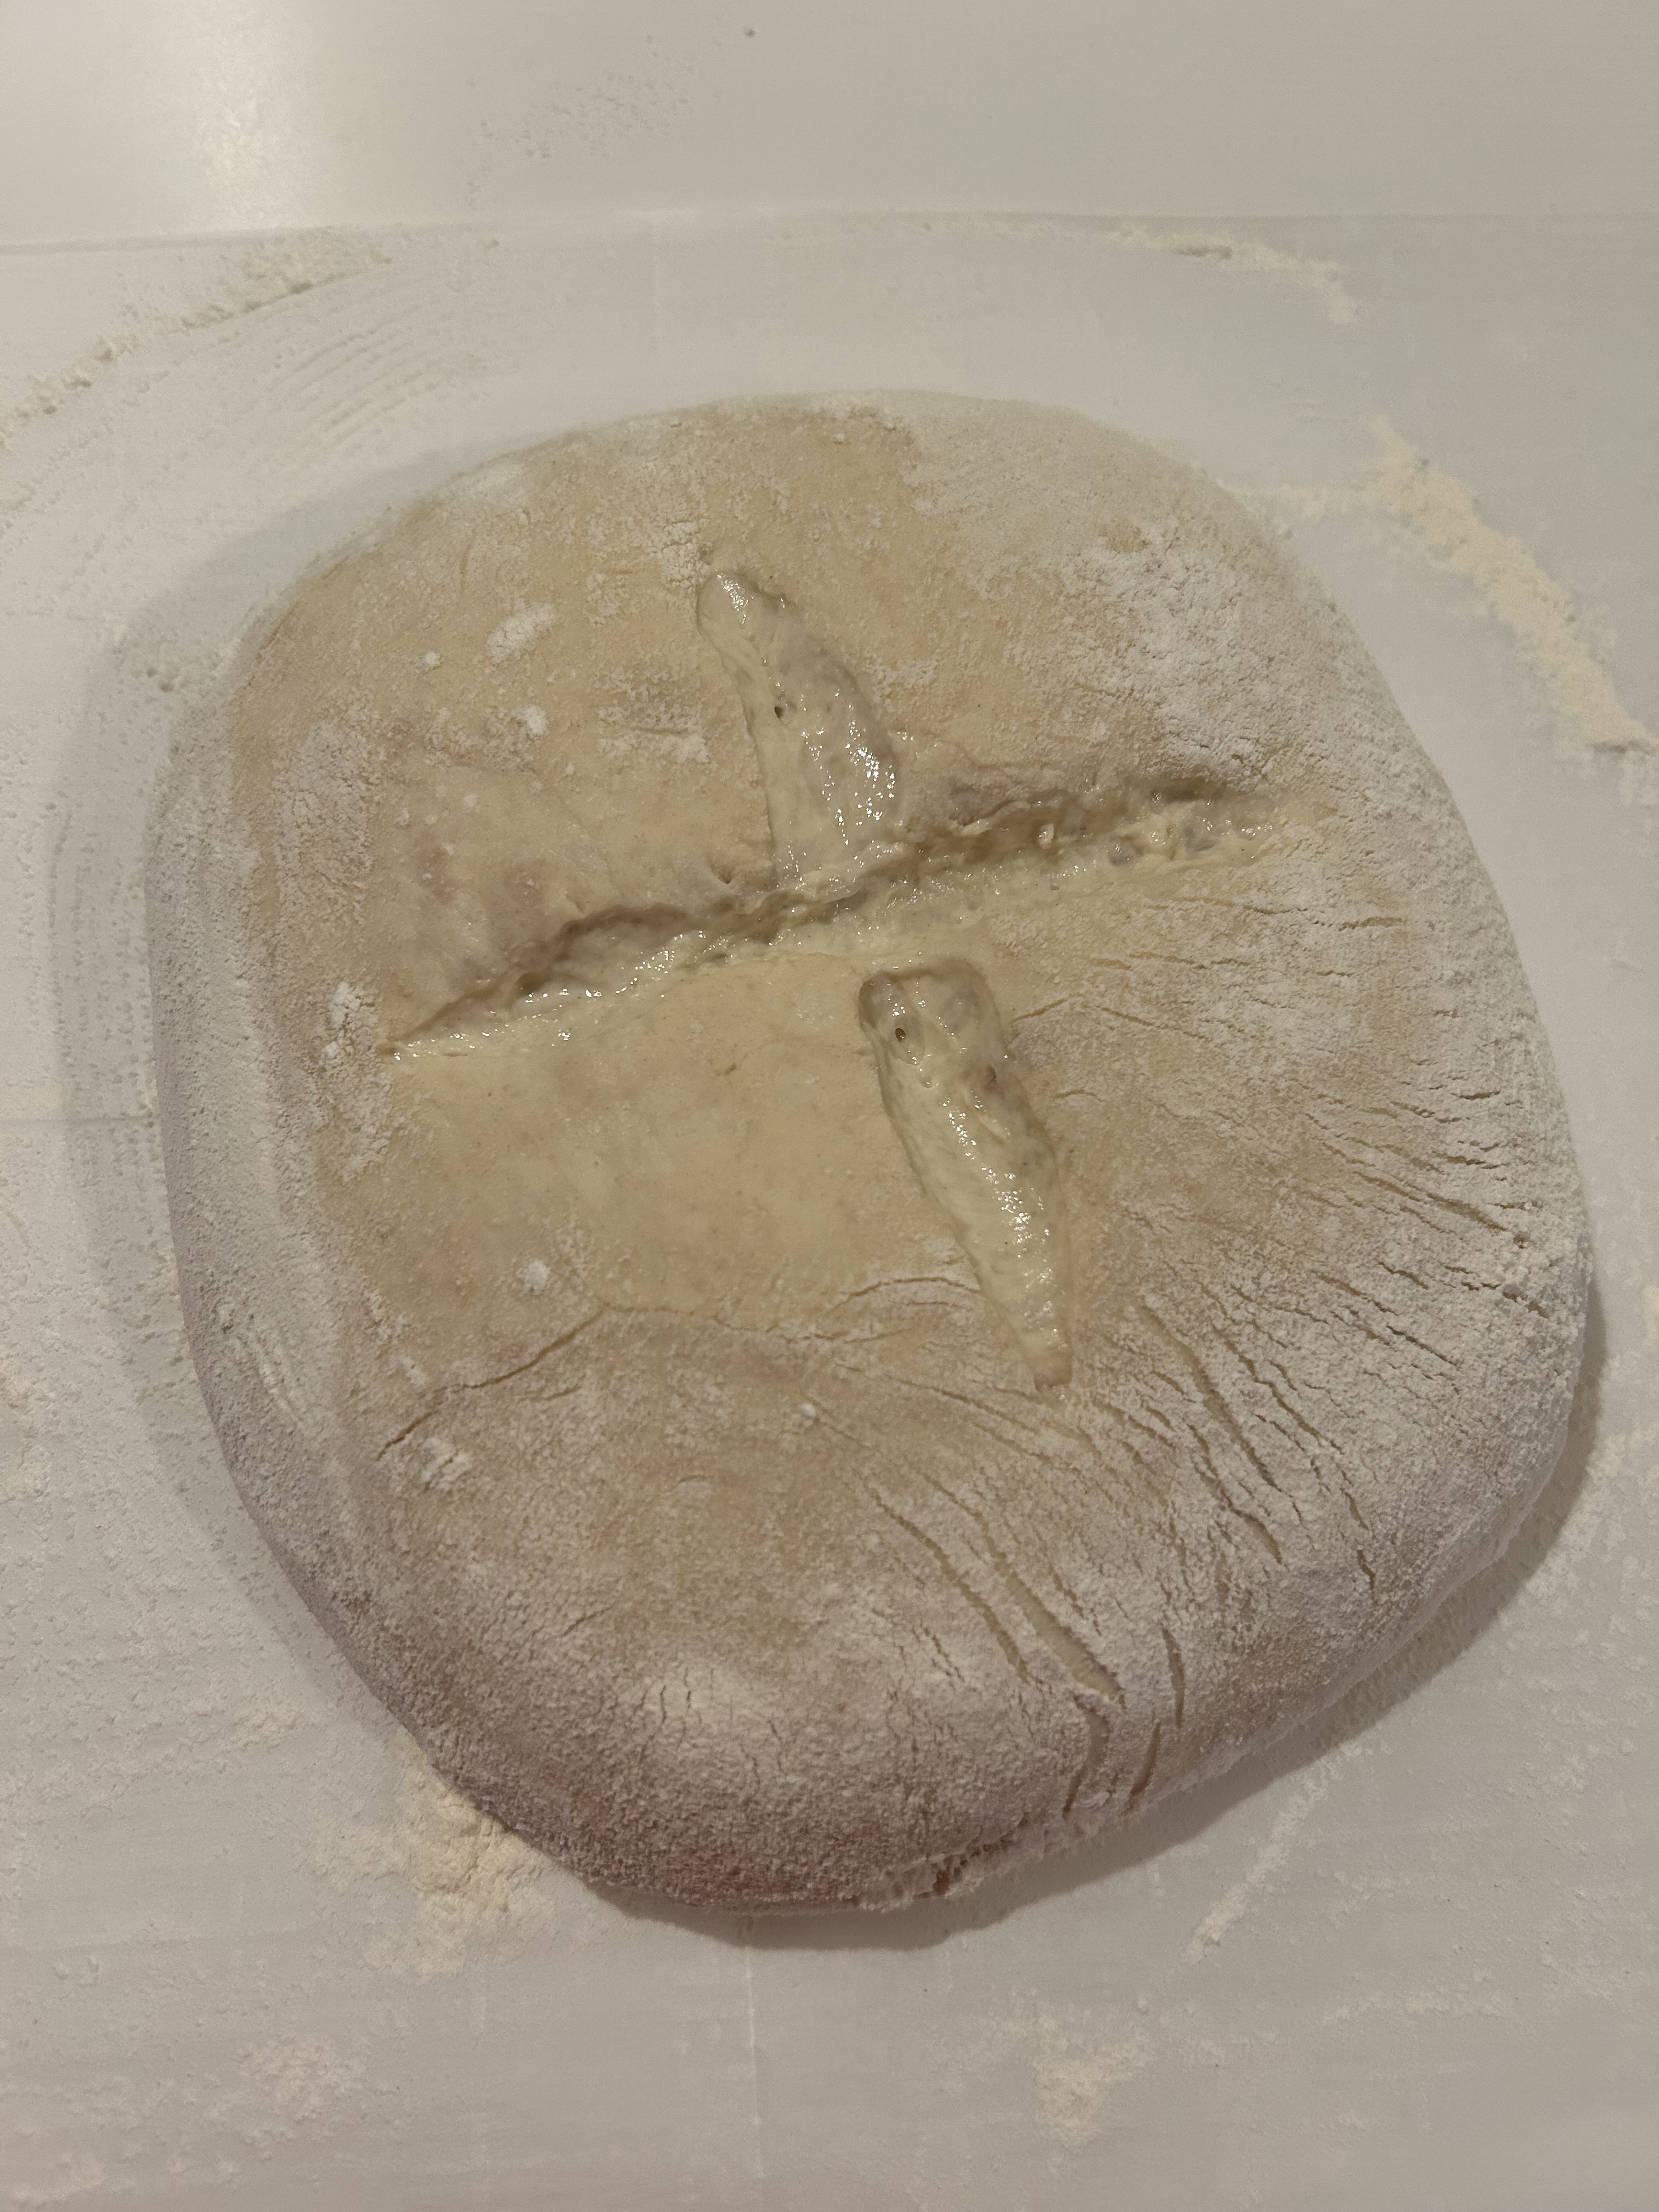
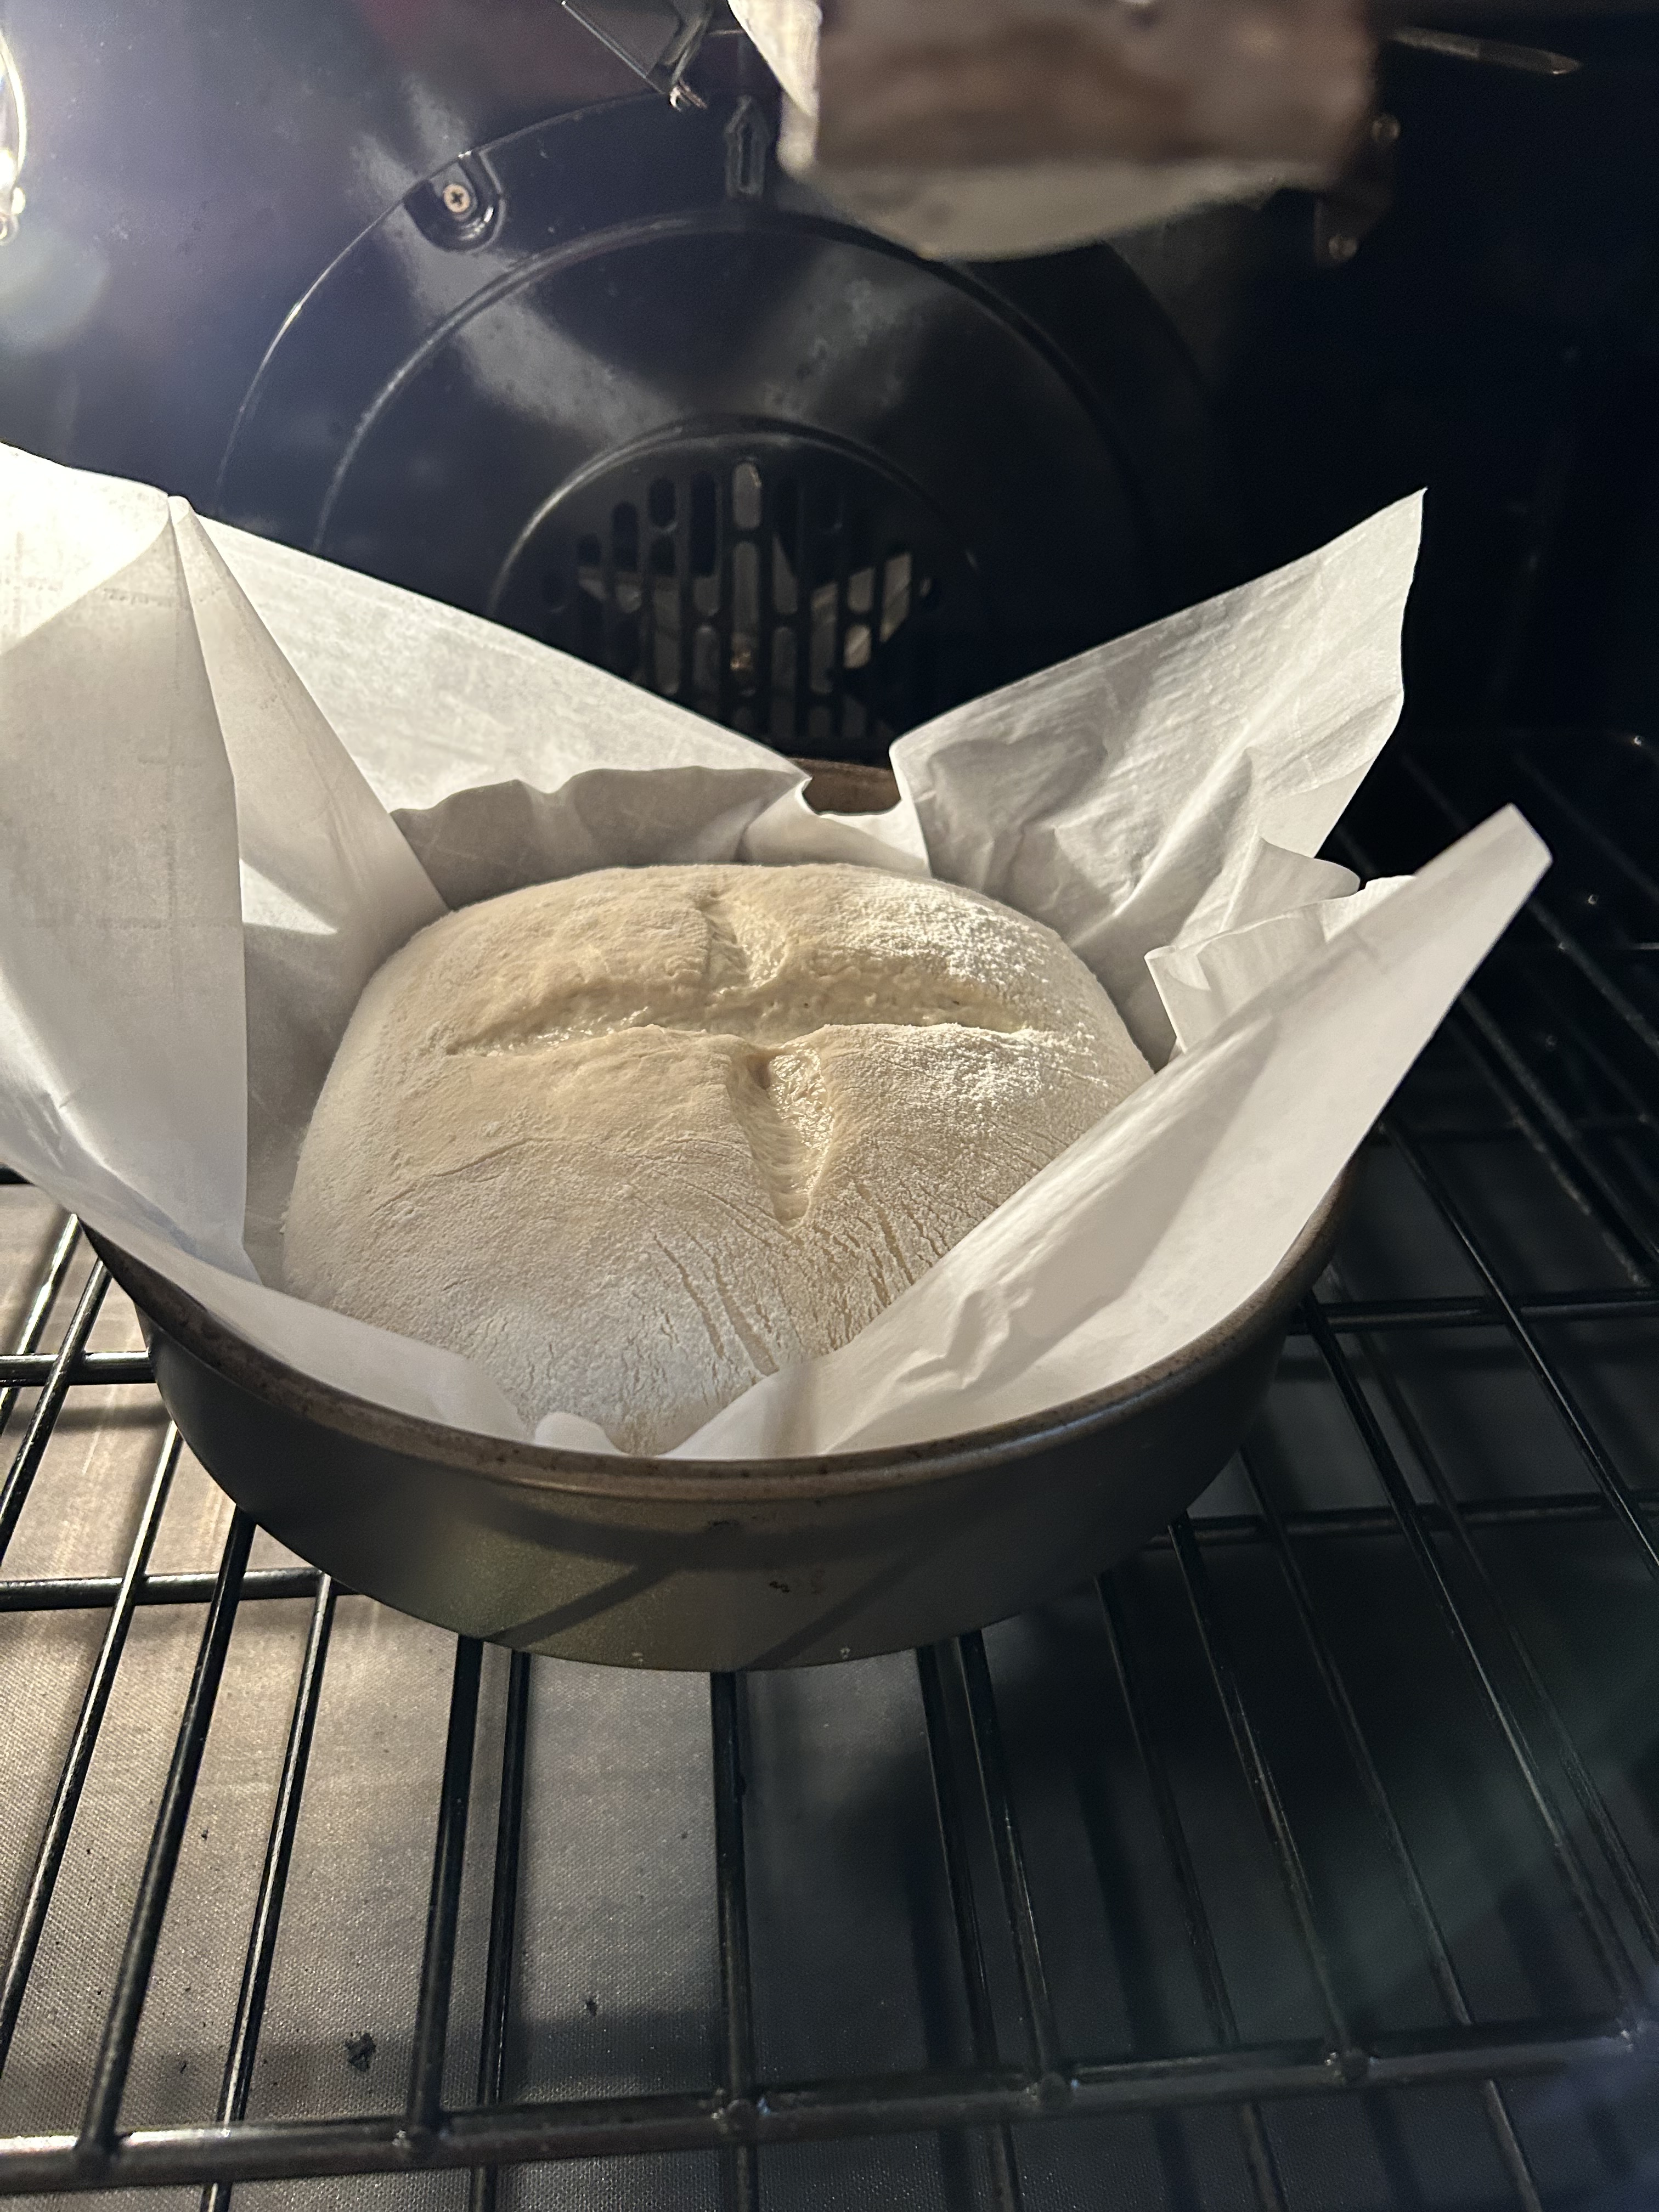
6. After the four hours are up, sprinkle a sheet of parchment paper with flour and turn the dough onto it. Remove the towel and make two cuts in a cross shape on top of the loaf with a blade (I use a box cutter I keep just for this). This allows the bread to rise and bloom in the oven.
Heat the oven to 220 C (420 F).
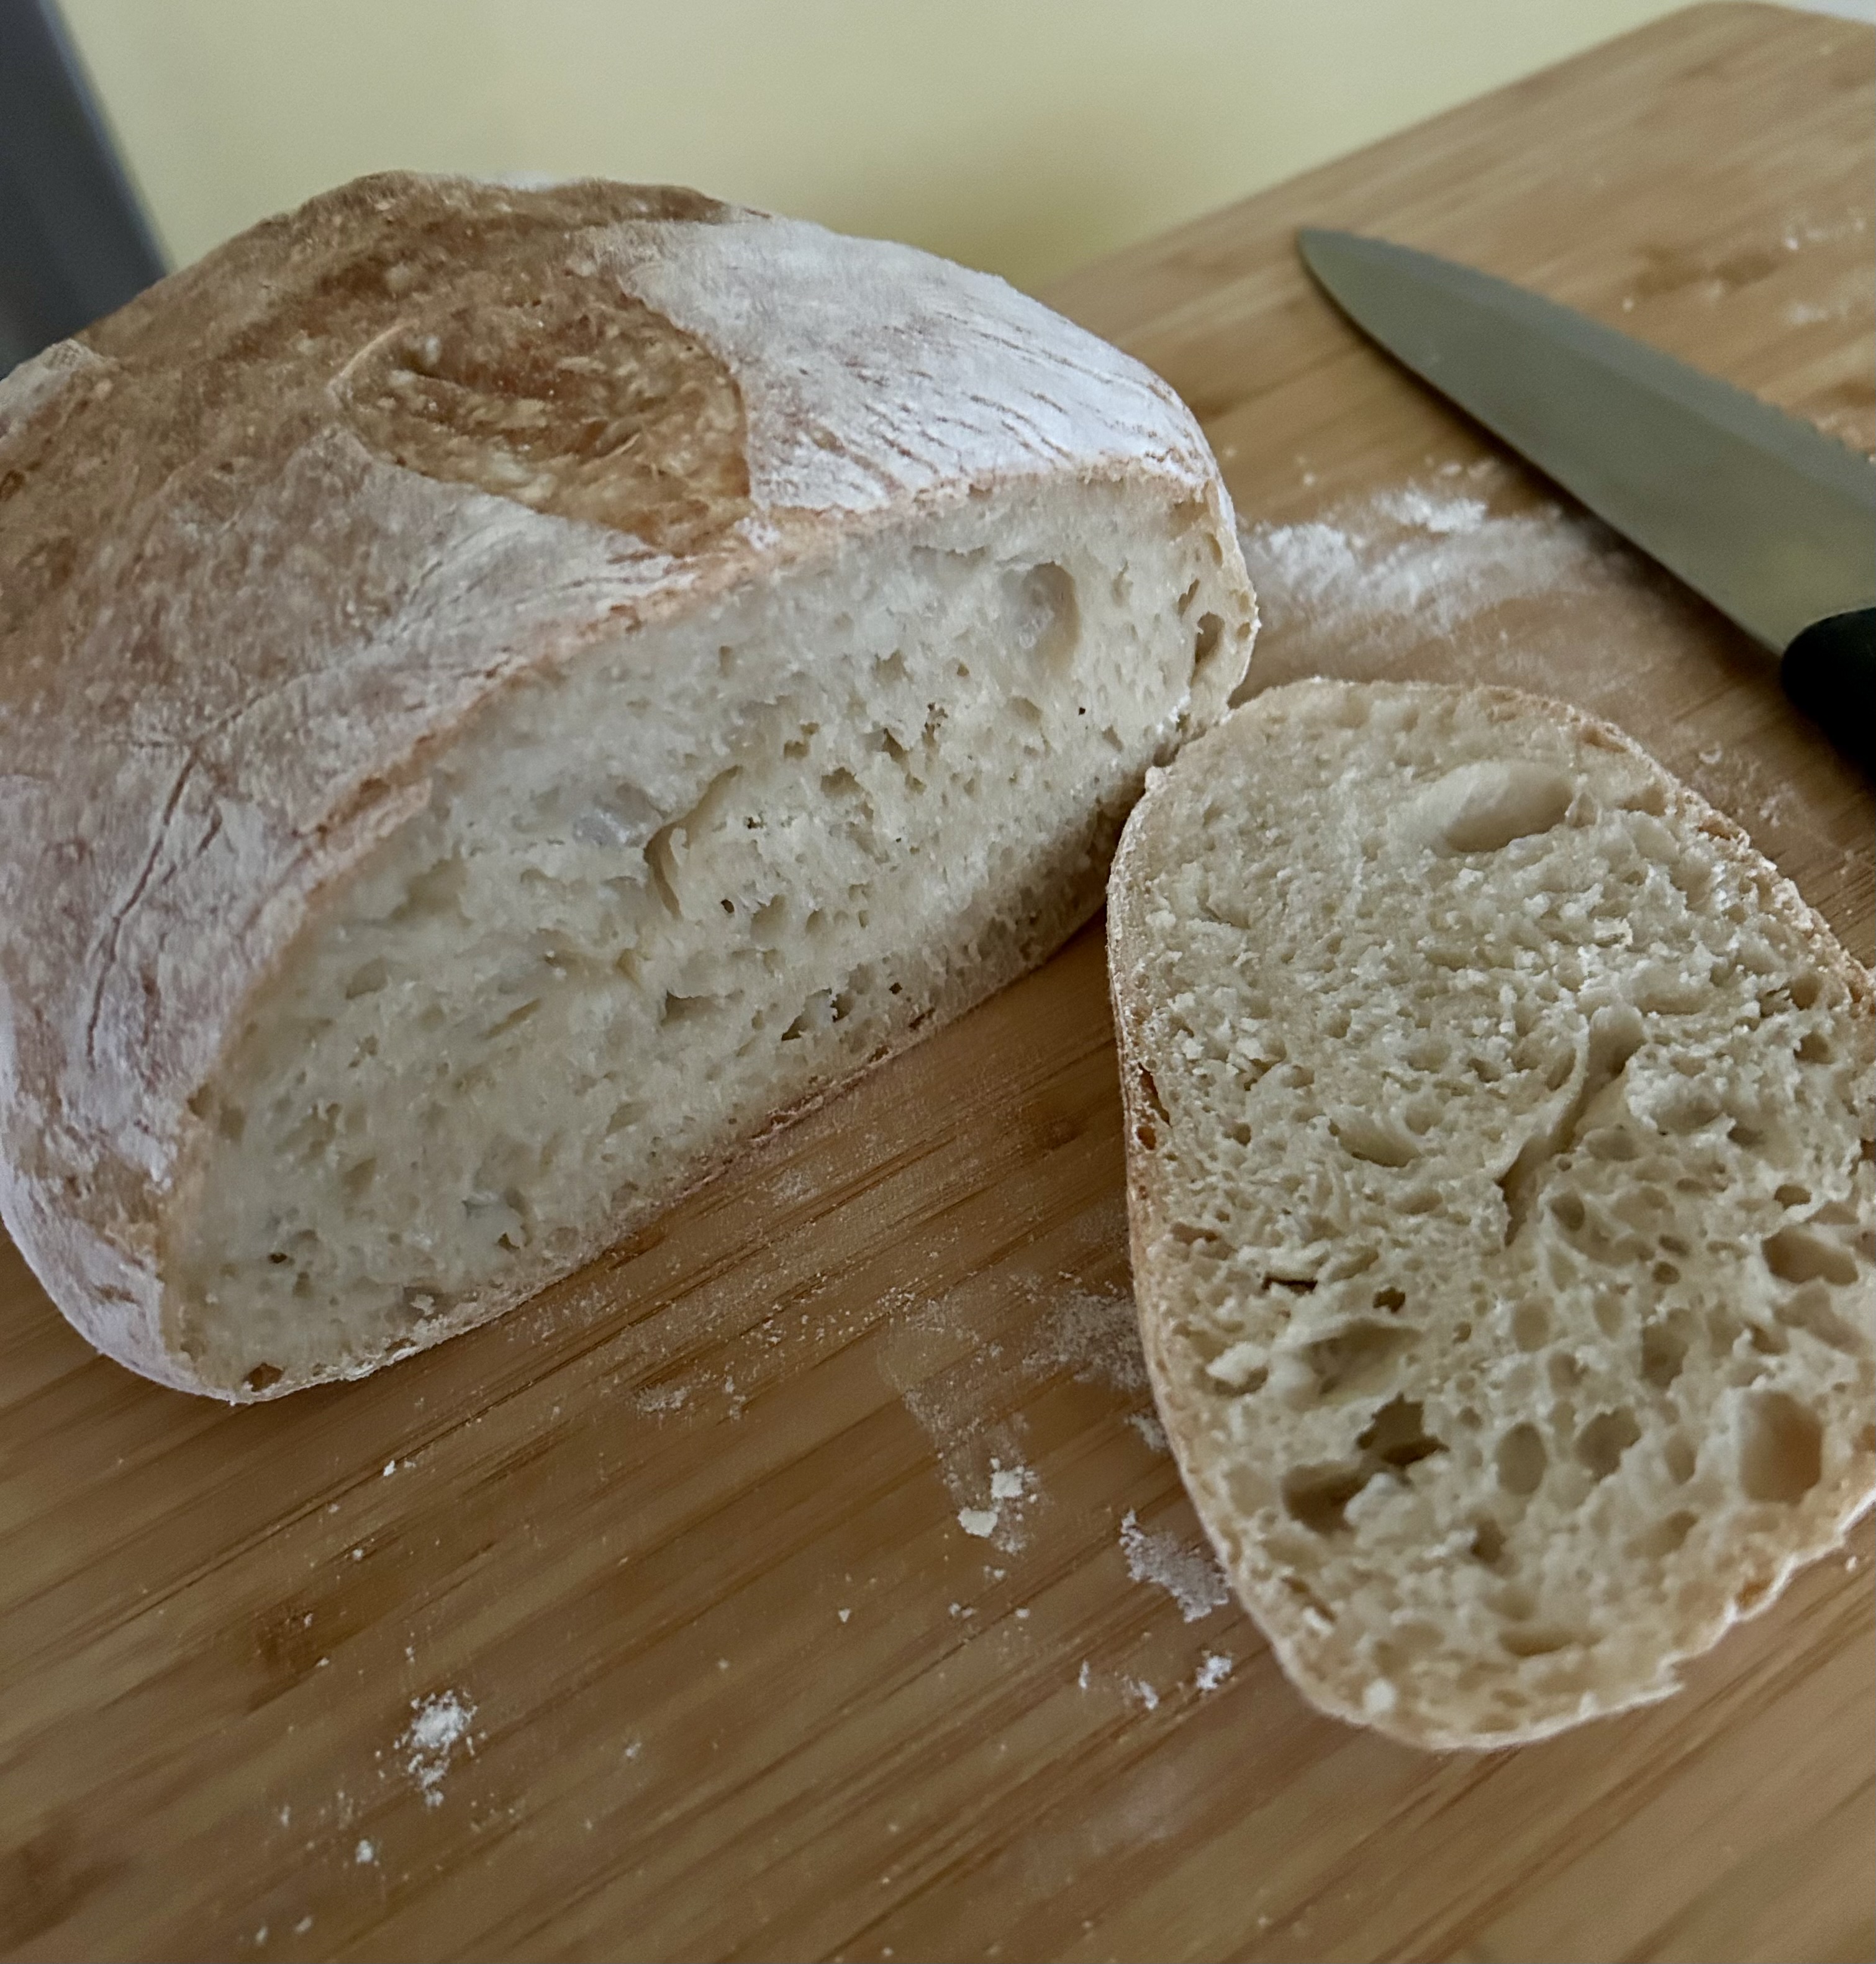
7. Place the dough still on the parchment inside a 10 inch round cake pan (better if dark). You can use a Dutch oven, but this method works very well too. Bake for about 40 minutes, or until the crust turns a golden color. Tap the bottom of the loaf to test for doneness. It should sound hollow.
If you give it a try, let me know in the comments—and post pictures!

Leave a reply to Anonymous Cancel reply