
Valentine Marbled Cookies
With Valentine’s Day just around the corner, love is in the air—and in my kitchen! What better way to celebrate than with homemade treats?
For me, baking isn’t just about satisfying a sweet tooth—it’s my way of staying sane. And with everything happening in our country and in the world, I’ve been wanting to bake a LOT!
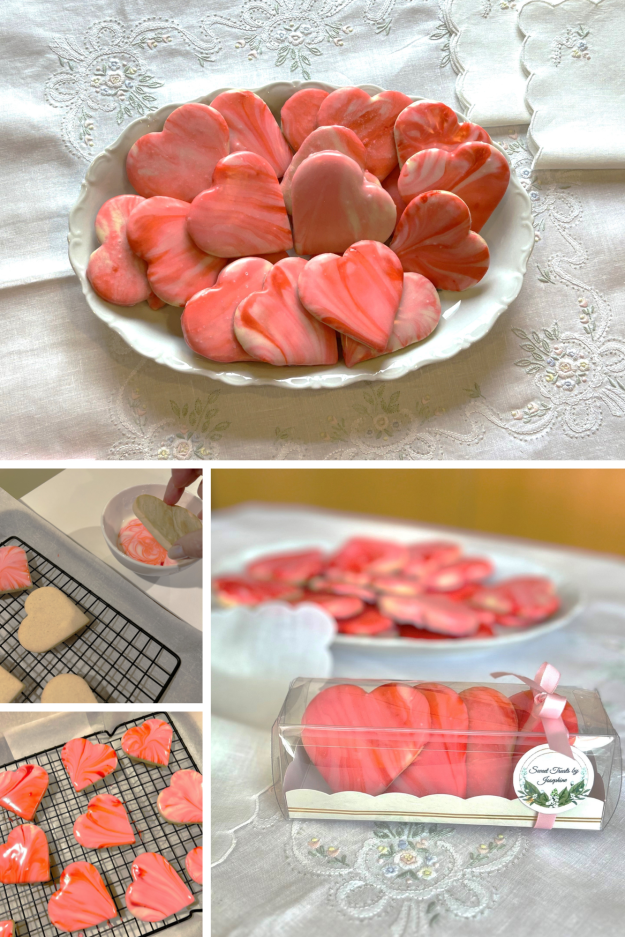
Usually it’s to whip up something traditional and decadent, like apple pie or chocolate chip cookies. But every now and then, I like to be a little more adventurous, experimenting with new recipes and adding my own twist. I spotted a picture of these cookies on Instagram and decided to give them a try. A photographer I am not—which explains the frosting appearing more red than pink—but I’m hoping to improve with practice.😊 I even picked up some little gift boxes to store them in, adding a fancy touch with a personalized label before sharing them with neighbors and family. The idea for individual treat boxes came to me after I made macarons for my granddaughter and her college roommates and found myself scrambling to find something suitable to put them in. Aren’t they just the cutest? There’s something so special about sharing a little homemade love in a beautifully wrapped package!
Valentine Marbled Cookies
🕓 Prep Time: 1.5 hrs ⏳ Cook Time: 15 min 🍪 Makes: 24 cookies
Ingredients for cookies:
- 290g all purpose flour
- 40g almond flour
- 130g powdered sugar
- Pinch of salt
- 150g cold unsalted butter, cubed
- 1 medium egg + 1 egg yolk
- 1 tsp vanilla bean paste
Directions for cookies:
- Place flour, powdered sugar and salt in a bowl and mix to combine.
- Add cubed butter and work into the dry ingredients with fingertips until crumbly.
- Add egg, egg yolk and vanilla and mix just until the dough forms.
- Wrap in plastic wrap and refrigerate for an hour.
- After 1 hour, roll out dough to a 1/4 inch thickness and use a cookie cutter to cut out the heart shapes. Place on a lined cookie sheet.
- Heat the oven to 180C (356F) and bake for 15 minutes until edges are just turning slightly golden.
Ingredients for icing:
- 375g (3 cups) powdered sugar, sifted after measuring
- 2 tablespoons light corn syrup
- 3-4 tablespoons regular or almond milk
- Half tsp vanilla or almond extract (better if clear for whiter icing).
- Pink gel food coloring
Directions for icing:
- In a medium-sized mixing bowl combine powdered sugar, corn syrup, vanilla and two tablespoons of the milk. If the frosting is too thick, add more milk (1 tsp at a time) until icing is smooth and drizzles in the bowl. The ribbon of drizzle should hold its shape for several seconds before dissolving back into the icing in the bowl. If the frosting is too thin, add more powdered sugar until it reaches the right consistency.
- Add a few drops of coloring gel to the bowl and with a toothpick or skewer create a swirling design.
- Dip the top side of the cookie into the icing and let the excess icing drip off. Place iced cookies on a rack. (NB: the white and pink icing will lose its swirl after a few times, so I separate the white icing in two bowls before adding the coloring, and use the second bowl when the first one becomes too pink.)
- Leave cookies on the rack until the icing is dry enough to touch or stack (preferably overnight).
I hope you enjoyed this recipe! Happy Valentine’s Day!


Leave a comment